I've really been using up the crayon/marker roll idea. I really think it's a great little gift for anyone who has (or, like me, collects) pens, pencils, markers, or crayons. Slide the utensils in, roll it up, velcro shut and it's quick organization inside a bag or purse.
For a lady who I volunteer with, I made six pen rolls. She is planning on giving one to each of her children's teachers. (One being a man, for whom she requested a "manly roll".)
When planning the pen rolls, I decided to make each for holding six pens. When figuring measurements for the initial cutting of the rectangle pieces, I found that vertical 7.5 inches x 7 horizontal inches worked best to fit highlighters, pens, and mechanical pencils. Each utensil should get 1 inch of space in the roll.
I used the Pleated Poppy's crayon roll tutorial when I first made this project. One can use velcro, snaps, buttons, elastic hair ties, etc. for the closure. I prefer the heavy duty iron-on fabric because I think that it will hold up for a really long time.
Showing posts with label marker roll. Show all posts
Coloring Pack
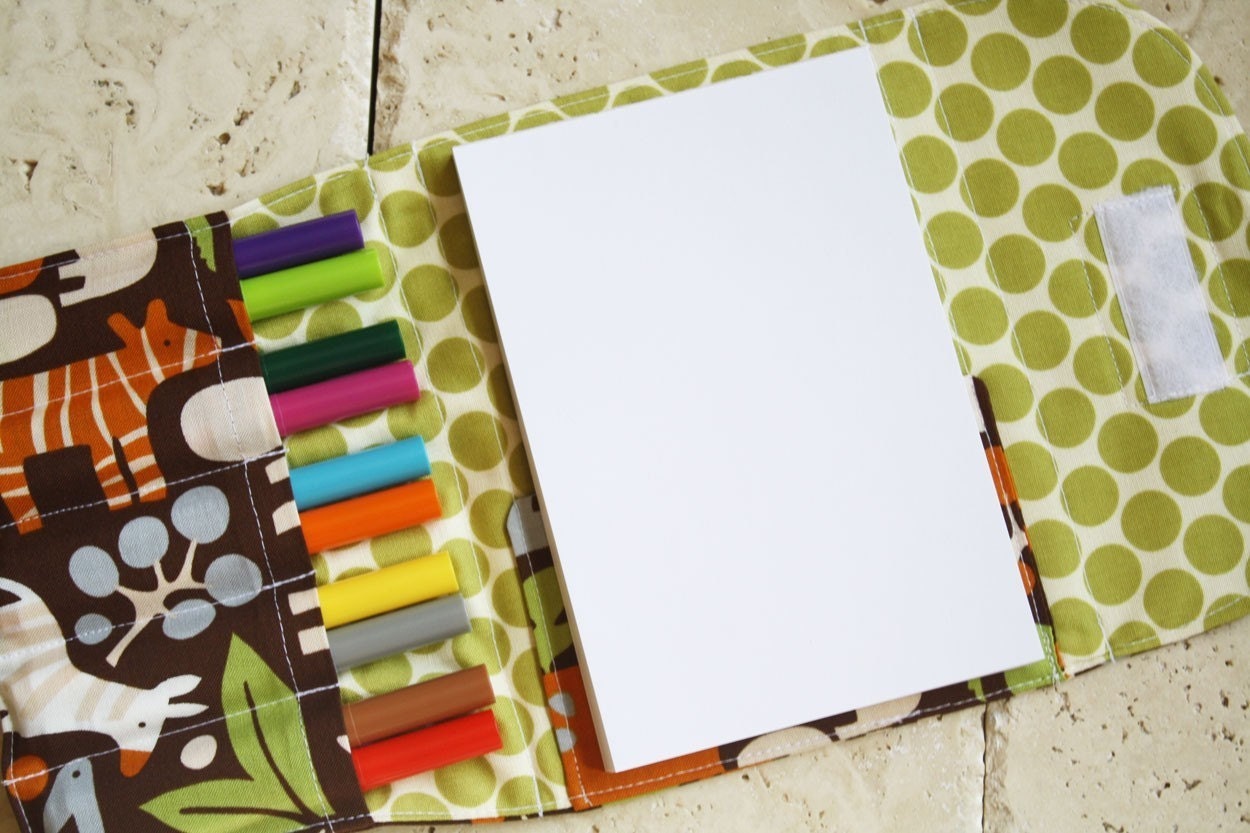
I have a cute niece who loves to color, so I wanted to make her something for Christmas that would hold all of her coloring supplies - crayons, pencil, coloring book. This little girl and her parents travel quite a bit and I thought that a case, of sorts, would be easy to put into a bag, into the backseat, etc. Inspired (and feeling confident) after making many marker rolls, I expanded upon that idea with Dilly Baby's Marker Wallet as inspiration.
Here's mine. I see a few places where I will do things differently, next time, but I'm happy with the result. I like Dilly Baby's "tightness" within the pack. I think I might have added too many inches to mine. Again, I'll reconsider that and some other things next time.
During cutting of fabric, I cut the larger pieces at 24 inches by 13 inches. Then, mapped out where I wanted the crayons and the coloring book. I had enough space to add a little space for a pencil to the right of the coloring book.
I wish that I wouldn't have had such a wide space between the crayon tops and the coloring book, but on the other hand, the full space allows the coloring book to be opened up on top of it. So, it's almost like this can be a portable coloring desk...
It folds up and then is closed securely with velcro. In the end it looks kind of like a little binder or Trapper Keeper for crayons and markers.
For the front, I cut out an M for the name of my niece and stitched it on. The stitching shows in the inside too, which I think is nice.
I hope she likes it!
Princess Marker Roll
There is a little girl in my life who loves princesses, so I purchased some "Princess and the Frog" fabric and used it to make a marker roll. I've been perfecting the marker roll process, and I'm happy with it, except for the closure step. I've tried hairbands, ribbon, velcro and decided that it was time to work with buttons. I found the cutest button at Michael's with a big 's' on it (the first initial of the little girl's name).And, it was only $1.
When I opened the package, I discovered that the button was actually a pin. But it worked out well. The hairband at the edge fits nicely over the pin and secures the roll. Also, I realized, if the pin comes undone my friend, the young girl's mom, can easily reattach. Plus, it's just really cute.
My marker roll is based off of my good exprience making the crayon roll at The Pleated Poppy . For the marker roll, I increased the vertical measurement a few inches - just enough to cover the tops of the markers, once inserted. The inside pocket needed to be increased, just a bit, too.
Subscribe to:
Posts (Atom)